Sneaky Embroidery
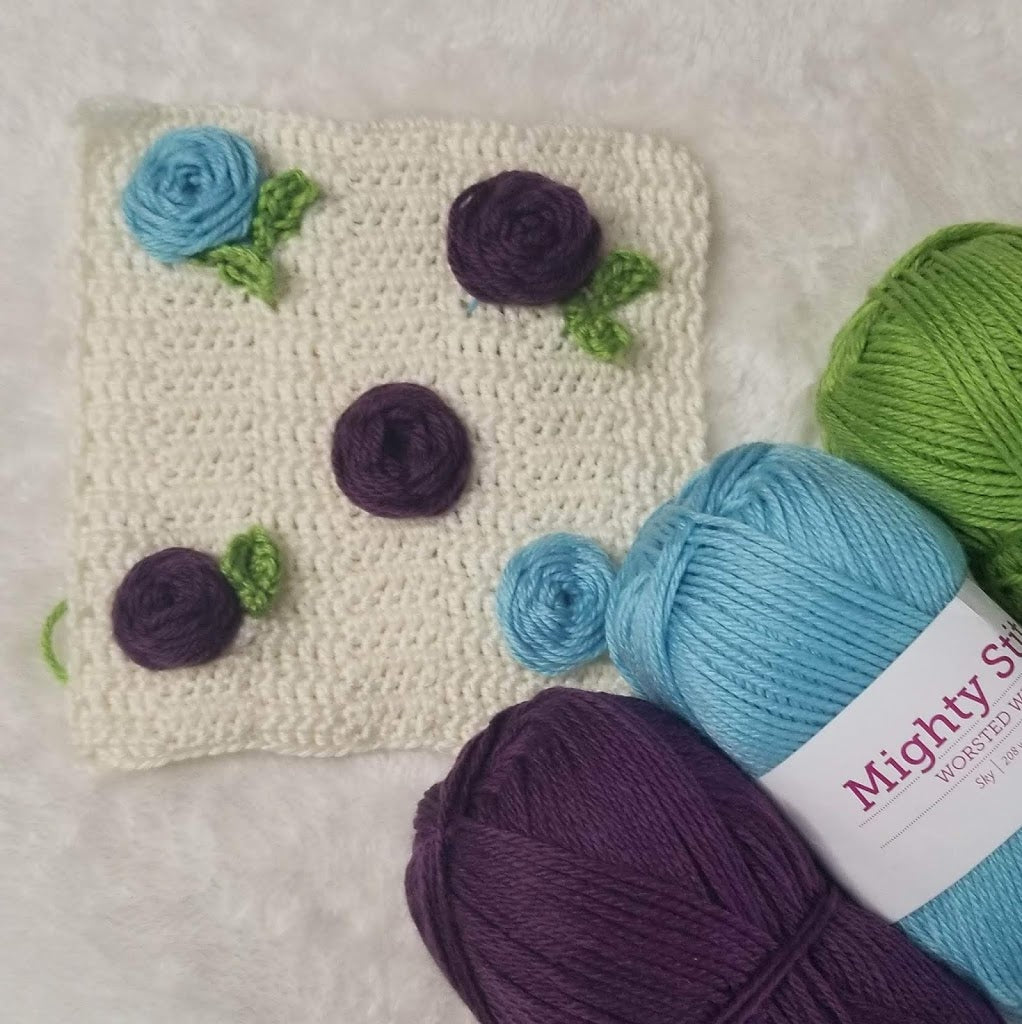
Embroidered Roses

This is my second square for the In Bloom Blanket CAL. Today I chose to use a mix of crochet and embroidery. I love doing crossover projects and the best part of this is the embroidery is so simple you do not need to be an expert sewer to make these roses!
To grab this square as a free PDF download, head over to the main CAL page to grab the download code, then use that code in my Ravelry store. (Valid 4/27/2020 until 11am EST 4/28/2020).
Supplies
This pattern uses Mighty Stitch which was generously donated by WeCrochet to each of the designers in the In Bloom CAL
For this square you will need the colours;
Alfalfa, Cream, Mulberry and Sky
Hook: 4mm
Notions: Yarn needle, stitch marker, measuring tape, scissors.
Gauge
4×4’ = 19 stitches by 20 rows of sc.
Abbreviations
Ch. Chain
Dc. Double crochet
Sc. Single crochet
St. Stitch
Set up
To make main square.
In Cream Ch 36. Turn.
Row 1: Sc in second ch from hook, sc 4, *dc 5, sc 5*. Repeat * across. Ch3, turn (36sts).
Row 2: Skip first sc, dc 4, *sc 5, dc 5*. Repeat * across. Ch 1, turn (36sts).
Row 3: Sc 5 * dc 5, sc 5*. Repeat * across. Ch 3, turn (36sts).
Row 4-30: Repeat rows 2-3 until you reach row 30.
Finish leaving a long tail. Weave in ends.
To Add Roses.
For the roses we are incorporating an embroidery technique. You can add as many or a few roses to the square as you like. I chose to add 5 to my square.

Step 1: Create a star shape using 5 straight stitches, I made mine roughly 1 inch each, if you want smaller roses make these stitches shorter. Using a contrasting colour of yarn (this makes it easier to see where you are weaving in the next step).

Step 2: Using your main colour for your rose, thread a yarn needle with a generous amount of yarn. Start by weaving under your first stitch, then over the second. Continue this around the 5 stitches.

Step 3: Continue weaving under and over each consecutive stitch until your rose is nice and full and the guide stitches are covered.

Step 4: Finish off by stitching under the rose a couple of times and cut yarn.
Adding Leaves

Using Alfalfa attach yarn to square as close to the edge of the rose using a surface sc. Surface Sc 3 more times. Ch 1, turn, going down one side of the previous sc, sc, dc, hdc, sc in each sc across. Slip st into main square, cut yarn and weave in ends.
In my example I have shown what it looks like to have two leaves on each rose, one leaf or non. I personally prefer the one leaf, but this is completely customizable.
This Square is part of the In-Bloom Blanket CAL. Head over to my blog to view all of the floral squares we have on offer! Don’t forget to tag any of your completed makes with #bearrye, #inbloomblanketcal or #springbloomsblanketcal